Dryer Balls

Back in May, we took a vacation. Or more accurately, enjoyed a temporary change of scenery. The term vacation would imply we were relaxing while sipping cocktails somewhere. We were travelling with a two-year-old, so we were really just going to unfamiliar places, trying to prevent her from harming herself others, while attempting to deflect public tantrums.

One of the many stops on our itinerary was Kings Canyon National Park. We’ve been going to Califonia annually for over a decade and we still hadn’t seen a giant Sequoia. In retrospect, this wasn’t the best adventure with a toddler in tow. I really need to remember that when I start planning our next holiday.

Anyway, we saw some big ass trees. Then, we decided to take the scenic route back to our hotel in Bakersfield, where we were stopping for the night before heading to Palm Springs the following day. It was scenic indeed as we wound our way down from the High Sierras, going back and forth, making sharp turns every mile or so.

Suddenly, we heard some strange noises from the backseat. Little B still sat rear facing then, so we couldn’t immediately see what was up- literally. Until the smell hit us. Trying not to panic (or dry heave), we kept driving until we found a turnout where we found our poor baby absolutely covered in regurgitated milk and crackers – her snack of choice earlier that day. Of course, we felt like the shittiest parents in the world because it never occurred to us that a drive like this might cause her motion sickness. Not only that, but there really wasn’t much we could do up there. We were on the side of a mountain in the middle of nowhere with limited cleaning resources in our rental car. We stripped her down, wiped her up the best we could with some take-out napkins and put her back in the seat with one of Jeremy’s t-shirts between her and the mess. Next, we gave her some fresh water and continued on the two-hour drive to our destination.

Later at the hotel, we cleaned the seat and aired it out of the balcony overnight. Thankfully, we were headed to our friend’s house where we could properly machine wash our soiled clothes.

Two things of note about my friend’s laundry situation.

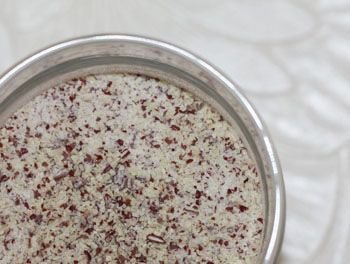
First, she had the most fabulous homemade laundry detergent. You can find the recipe here.

Seriously – it was AMAZING. It only took one cycle to get the barf smells and stains out of our stuff and in my (thankfully) limited experience with baby puke, it usually takes at least two washes to completely get that odour. PLUS, these clothes had been marinating for nearly 24 hours in a plastic bag in the trunk of a hot car!

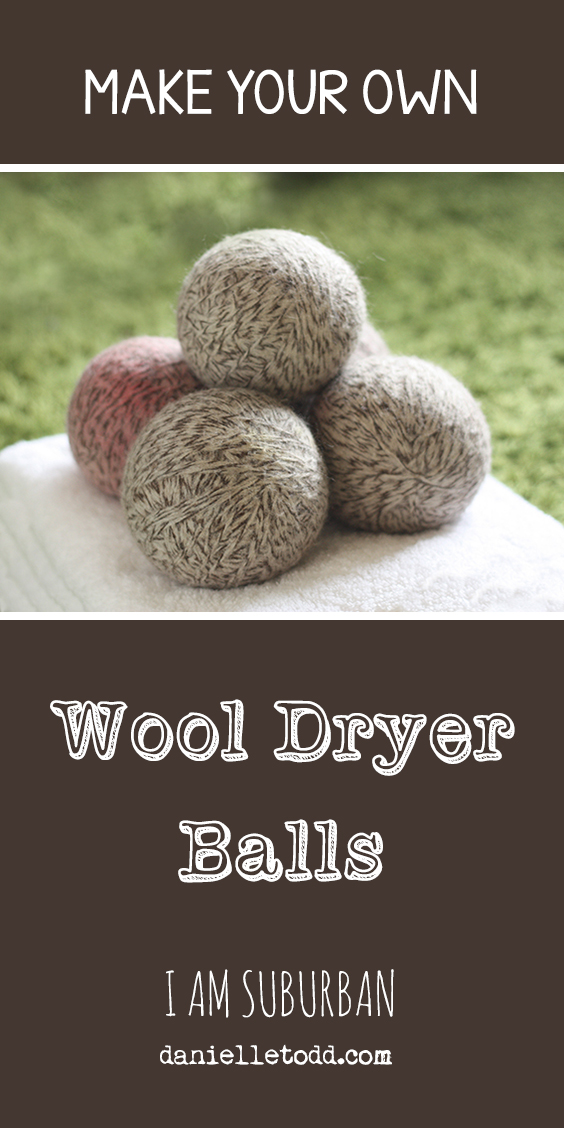
Second, she had wool dryer balls.

For the uninitiated, dryer balls are a greener alternative to dryer sheets for adding scents to your clothes and reducing static cling. They also help cut down on dryer time absorbing some of the dampness and by creating more space between your clothes.

They’re not expensive, so this is one of those crafts that if you had to go out and buy supplies you would likely spend way more than it would cost to just go out and purchase them already made. However, if you’re like me and have a bunch old wool sweaters tucked away for felting projects you’ll probably never get around to, then this is a great project to use up that stash.

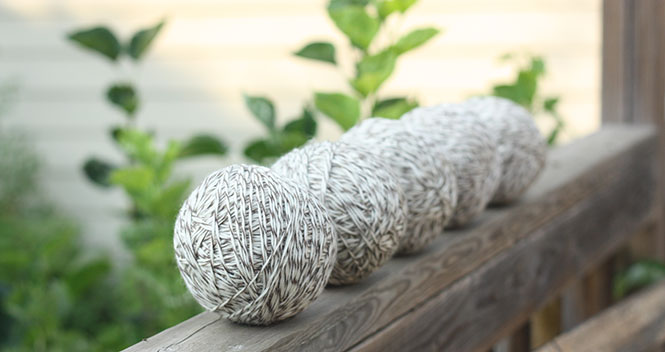
I started by cutting my sweaters into long continuous strips and rolled them into balls in the same way you would wind yarn into a ball, tucking in the loose ends as I went along. Your balls should be about a bit larger than a softball or and they will shrink to about a baseball. I used four small women’s sweaters to get this size.

These look pretty messy, but that’s ok because they’ll be covered with a layer of worsted to tidy them up.

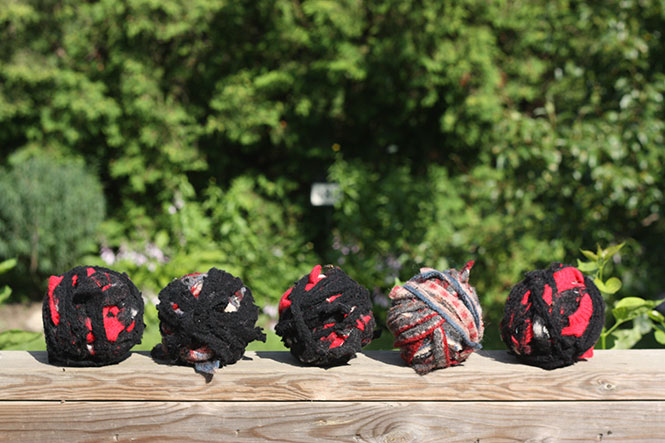
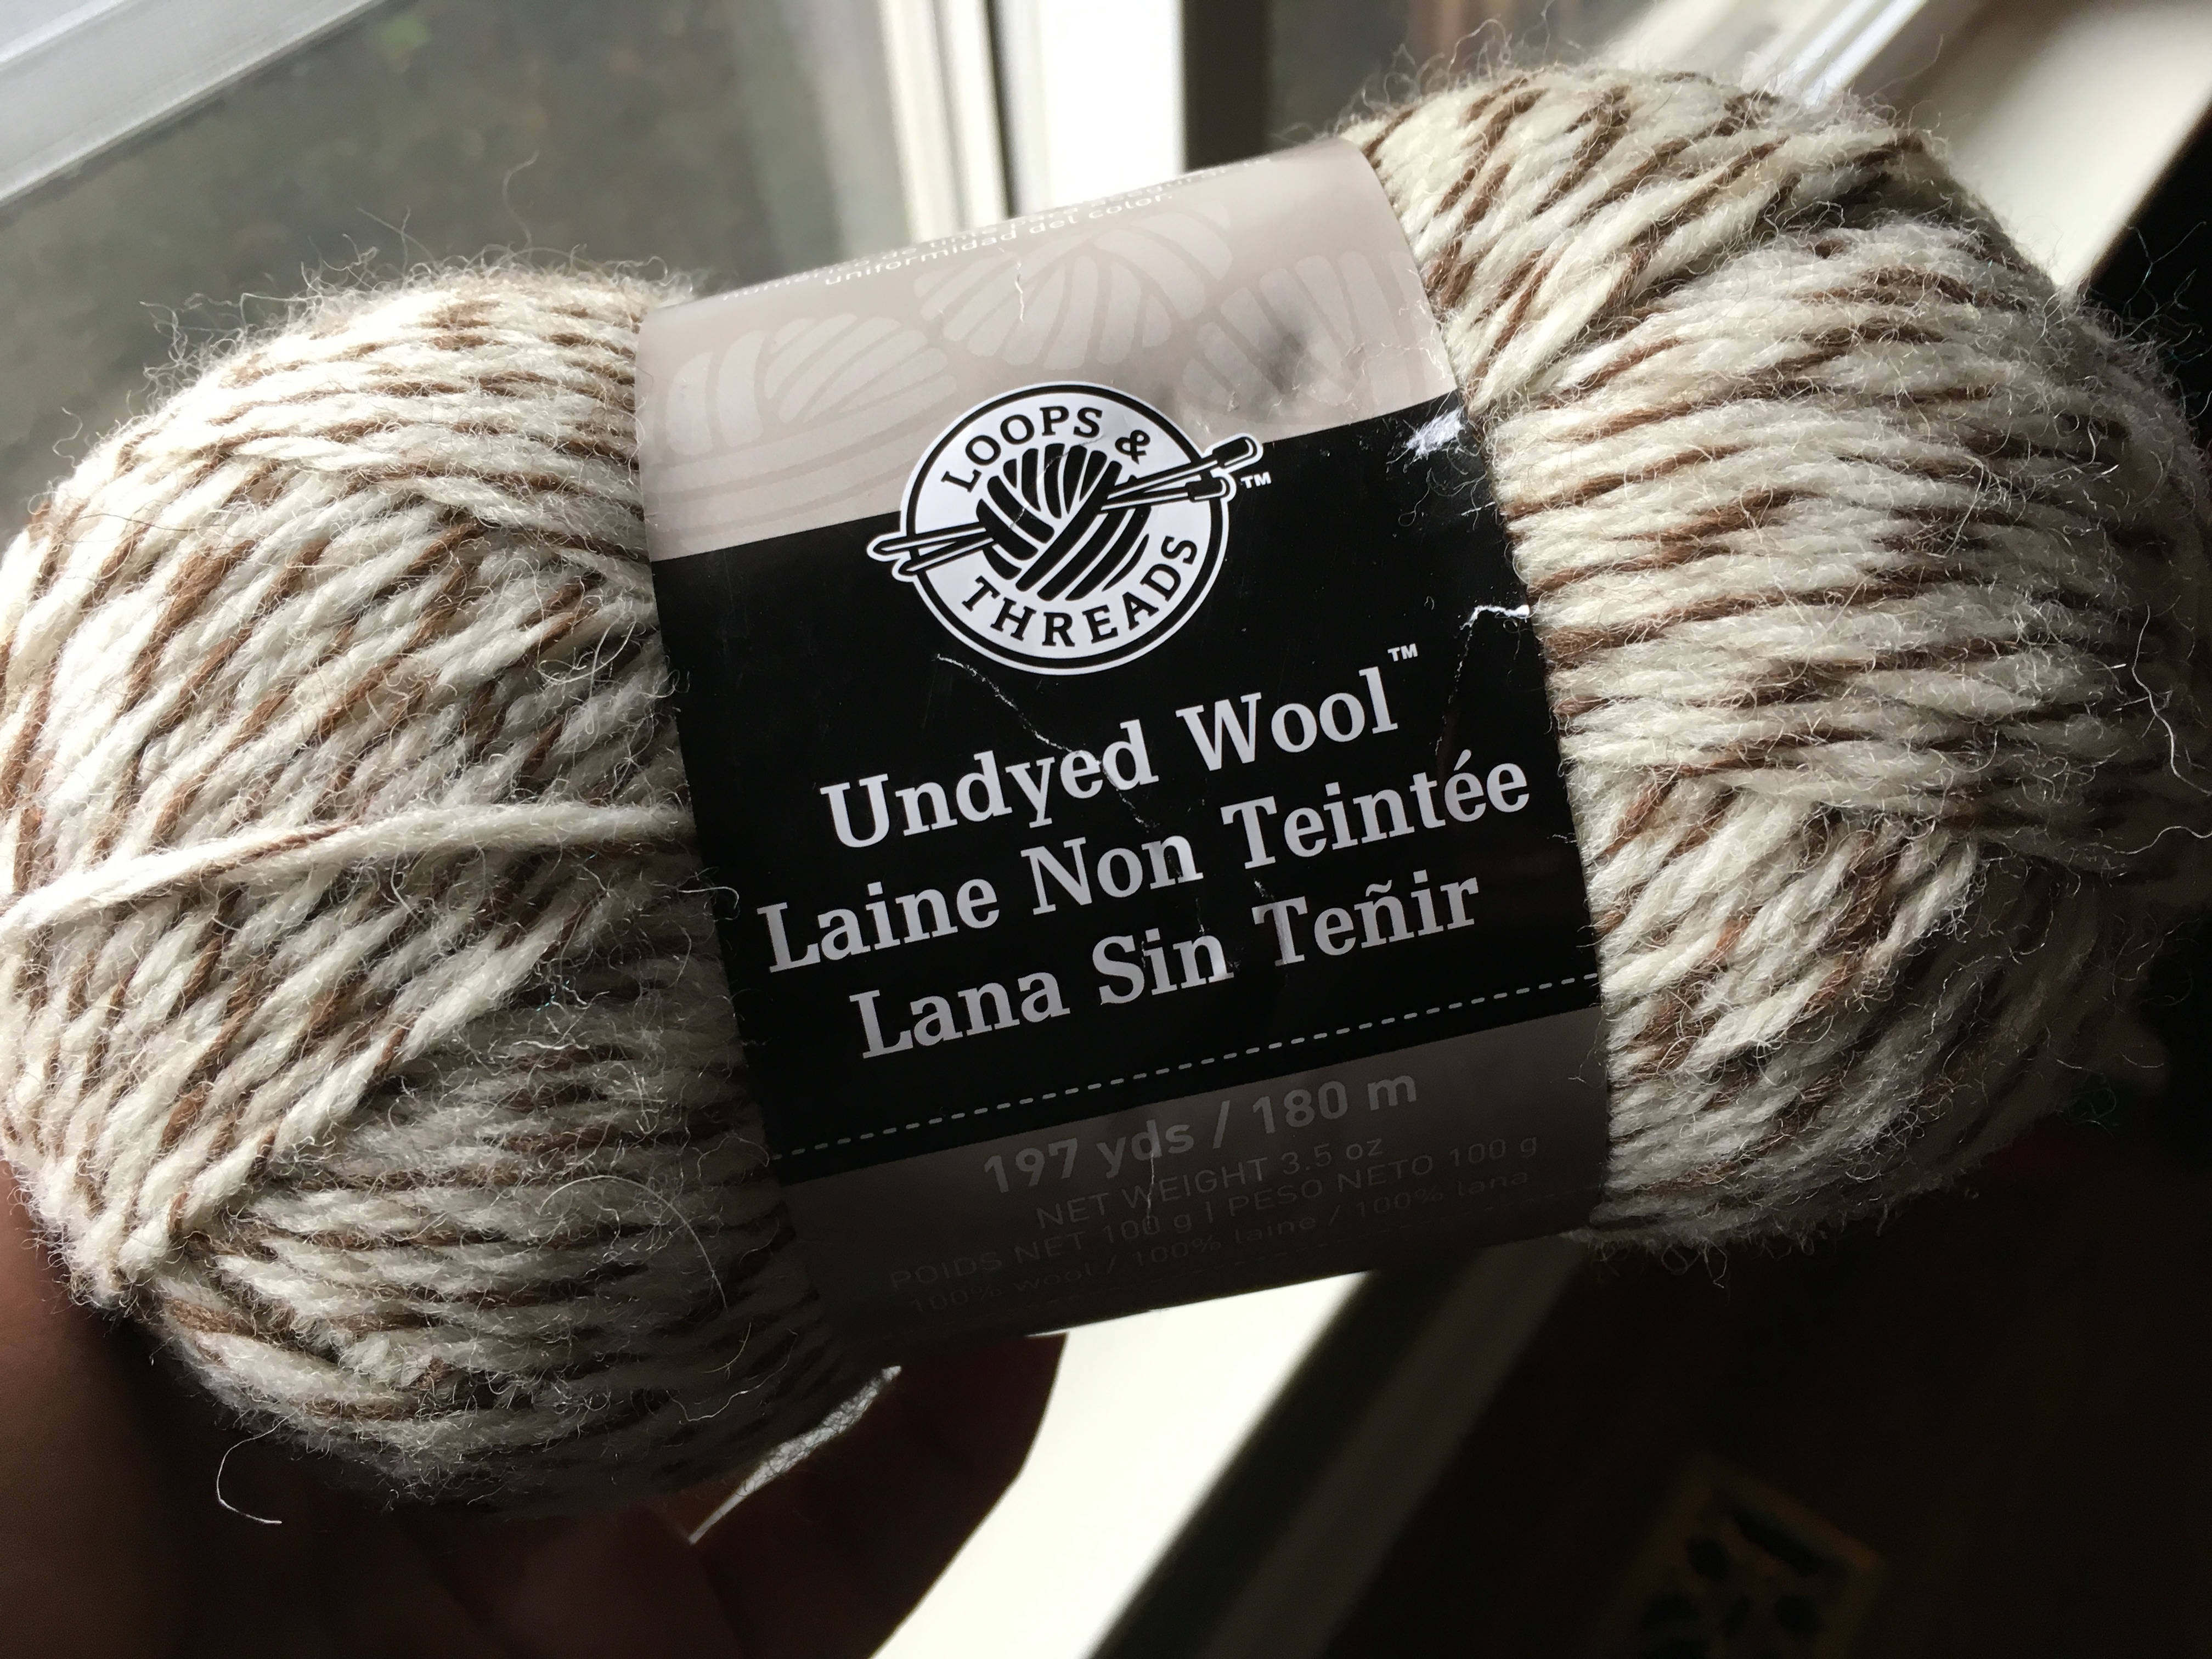
I bought two of these from a clearance rack at Micheals, keeping this project at about $6.50 – still well below the cost of buying them.

There. Much better.

If you were born after the baby boom, you might not have any pantyhose around, but this is what you need for the next step. I had some because despite being born in the mid-70s, I’m a bit old-school when it comes to foundation garments. Sure, I’ll do bare legs in a dress the hot summer, but for the rest of the year if I’m getting really dressed up I believe a slip and a pair of very good quality sheer nude nylon hose makes one look polished. If you don’t want to take my word for it, just ask Kate Middleton.

So, I shoved the balls into the leg of my old stocking tying each one in tightly. (I suppose tights would probably work too). This is going to help with the felting process.

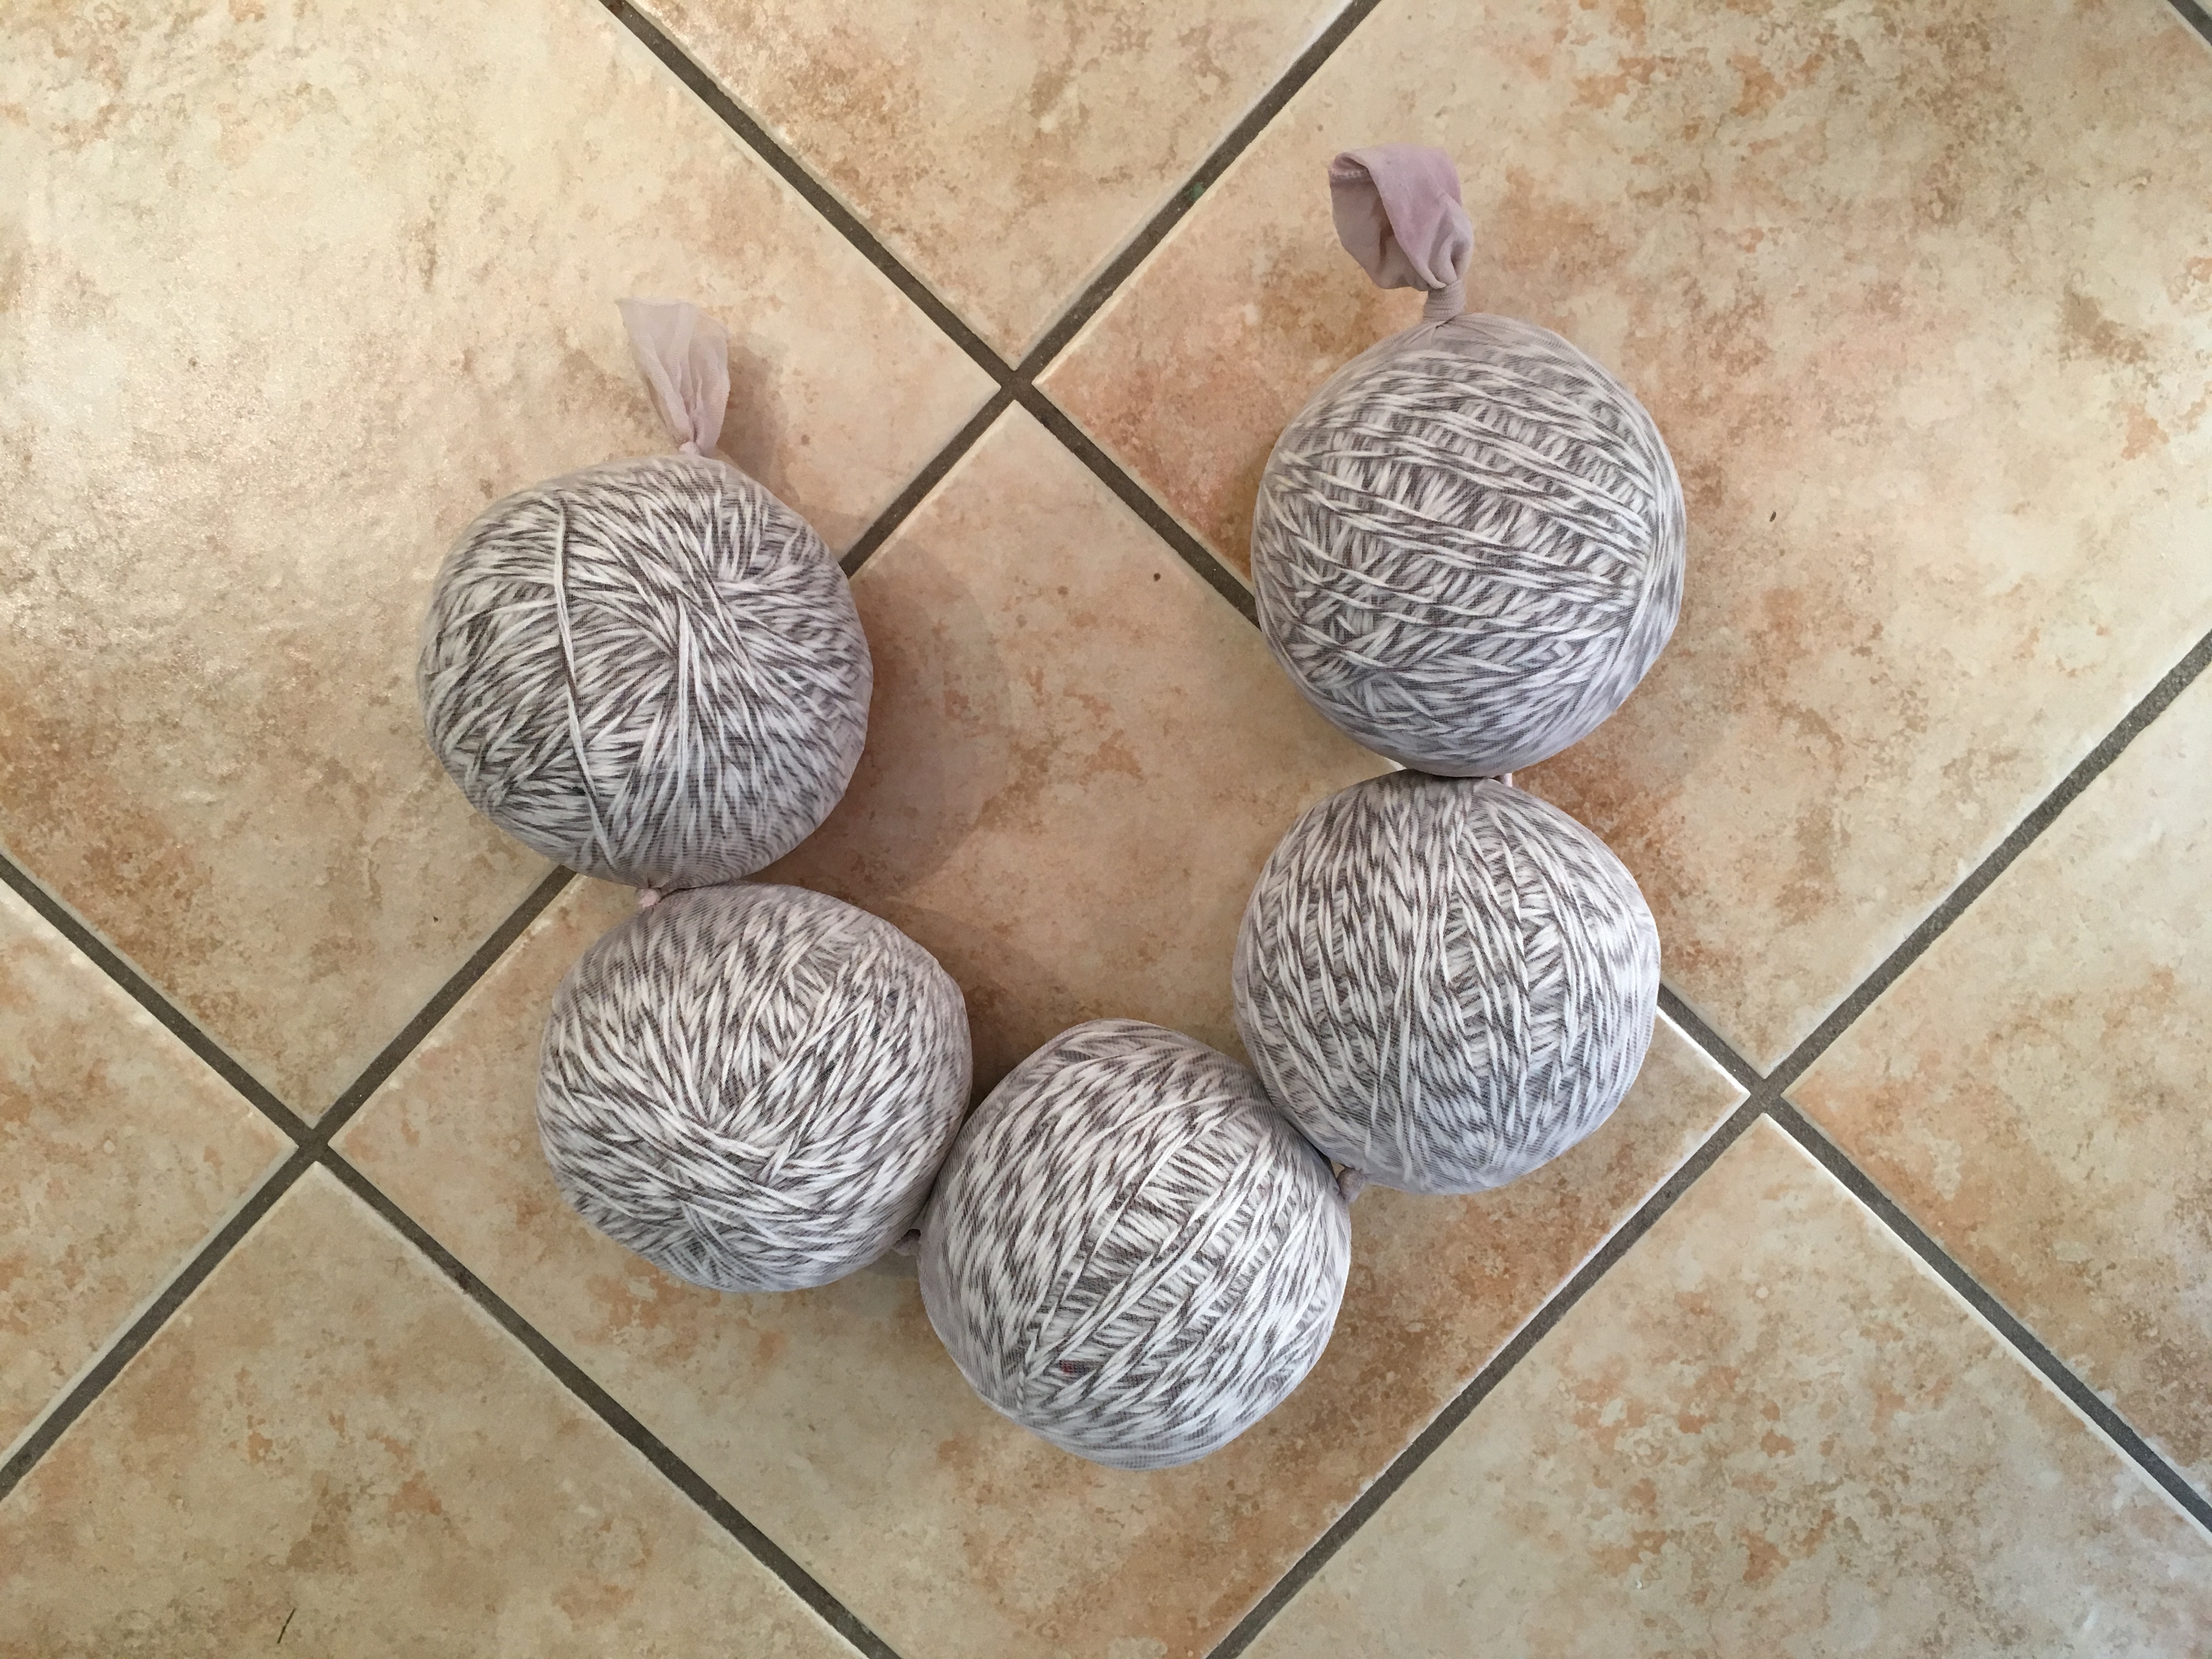
Next, I soaked the balls in a bucket of very, very, hot water. A few tutorials I’ve seen recommend just throwing the balls in the washing machine on a hot cycle, but our high-efficiency front loader doesn’t use enough water to effectively bind the fibers. After wringing them out the best I could, I dried them (with a load of bed sheets) on the highest heat setting. Then, for good measure, I repeated the process.

All finished!

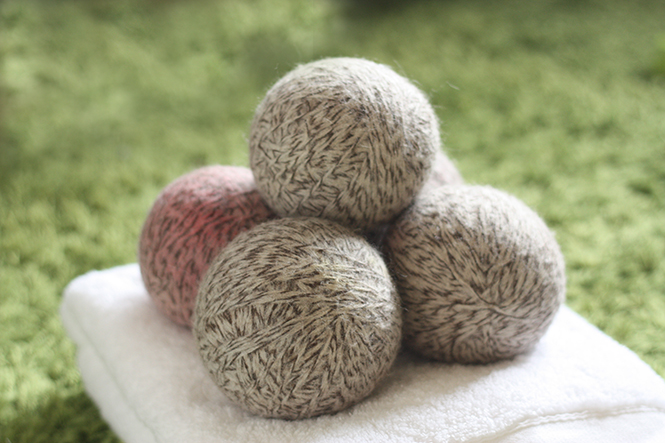
As you can see, some red from one of the old sweaters bled through one of the balls. I won’t use that one with my whites, obviously.

There is a downside to dryer balls. They’re noisy as heck. It sounds a bit like a herd of bison are charging through the laundry room when they’re in motion, but since they cut down on drying time at you don’t have to listen to it for very long.

Continue Reading

The Alphabet Wall

I started this post way back in 2014 when we were decorating our first daughter’s bedroom. This project was to be the pièce de résistance of the nursery and I actually managed to get in finished in time for her arrival. Of course, she didn’t come home with us, so we covered the furniture, pulled down the blinds and shut the door on that room until our little B was on her way. I worked really hard on this, and now, as we’re transitioning her room from a baby to toddler space and are considering taking it down to do something else, I think it is worthy of a post, even if it is three years after it’s completion.

Have you ever taken on a craft project and realized you’re in over your head?

It happens to me more than I care to admit. Pinterest is obviously at fault. No matter how many times I remind myself that most of my pins have been designed and photographed by professionals, I still try to live up to those impossible standards.

In late 2013, I was in full nursery decorating mode. At this point, we knew we were having a girl and we’d decided on apricot for the walls and a bright green shag rug from Ikea. For the back wall I was obsessed with the idea of an alphabet wall with an eclectic arrangement of different fonts, sizes and colours. If you do a search for alphabet walls there are tons of them similar to ours – it’s been done many times and seemed simple enough in theory, but it turned out to be far more work than I’d bargained for. Once I got started though, there was no turning back.

I will preface my vague instructions by telling you that you can buy a kit for this. It comes with all 26 wooden letters, unfinished, and costs around $100 on Etsy. I would really recommend this route if you are looking to try this yourself.

I didn’t buy the kit. Instead, I thought I could save a buck and decided to hunt down the letters on my own. It took a lot of time and energy, and really didn’t save me enough to make it worth the hassle. By the end, the cost of the letters alone, actually came close to the kit price.

Collecting the letters was time consuming and a huge pain in the ass. They came from everywhere – thrift, dollar and department stores, plus every craft/art supply store within a 100km radius. I kept a list to keep track of the ones I’d already bought but I wasn’t overly concerned about the size, case or fonts of the individual letters, I just focused on finding one of each.

Next came the fun part – painting and decorating. I used acrylic craft paint for most of them. I just bought a handful of basic colours and mixed different shades. I also bought some patterned scrapbooking paper and used mod podge to glue and seal. Then on the O (which was actually a small Ikea mirror), I added buttons because it just felt right. I didn’t have a definitive strategy for colours, I just made it up as I went along.

At this point, they were almost ready to hang. I added hardware to the letters that didn’t come with hangers already. For the ones thick enough to hammer a nail into, I used small metal saw tooth hangers, and for the thinner letters, I used adhesive fabric eyelets (both can be found with the picture hanging thingies in any hardware store).

Then, to get the layout just right, I cut templates out of paper and arranged them on the wall. This step took FOREVER. It never ceases to amaze me how difficult it is to make things appear random. After almost a week of arranging and rearranging the templates, it was finally time to hammer in the nails (I used thin, 1 inch nails).

The overall cost was about $130 in the end, including the letters, paint, and hardware. This was certainly one of my more successful Pinterest inspired projects and I was really proud of the end result. The execution was a bit of a fail though – if you’re trying this at home, buy the kit. You won’t regret it!

Continue Reading

Washing Grains

Last year, I replaced my VO5 Hot Oil Treatment with olive oil. Since then, I’ve been thinking about some other products I’d once used, but have long forgotten.

Back when I was in high school, I loved The Body Shop. I still do, actually.
In the early 1990s, they had a product called Japanese Washing Grains. It was a grainy powder that could be used with a little bit of soap to exfoliate your skin. If I recall correctly, the suggested regiment also involved elderflower toner and cucumber moisturizer. I’m not sure when I stopped using these products but I suspect they became too expensive when I went away to University. When I moved away from home, I had to make room in my limited budget for more important things – like beer…err, I mean, books. Ya, that’s it, books.

I wanted to revisit the Japanese Washing Grains because I remember how much I once loved them. Apparently, they were simply ground rice and adzuki beans and the effect was similar to the microdermabrasion products that have been popular in recent years.

The Body Shop does carry a product similar to my old favorite. It comes in a 4 ounce jar, and retails for $22.00, plus tax. That just seems like a lot to me for a half cup of beans and rice. After a visit to the bulk barn, I discovered a scoopful of adzuki beans can be purchased for only $1.50.

I’m sure you can see where this is going.

Using an old coffee grinder, I keep around for projects like this; I ground up a few handfuls of dry beans and rice and put it in a jar.

This container holds just over 8 ounces of grains. My University degree was neither in math nor business, but it certainly doesn’t take a financial expert to figure this one out.

Continue Reading