

Last year I introduced our new holiday friends: Nils and Thom. This year I had grand plans to spend a balmy autumn afternoon in the backyard with my craft supplies and camera to give you a detailed and artfully photographed tutorial to show you how I made my gnomes. Unfortunately, winter came to the greater Toronto area early and with guns blazing. I was running out of time so I had to work on this project within the tight confines of our small kitchen on a grey snowy day.
If you want to make some of your own, here’s what you need to get started:
Basic Wire Tomato Cages
I used a 30 inch and a 42-inch cage but if you can’t find multiple sizes you can always prop one up on a stool or crate to give the look of varied heights.
Evergreen Boughs
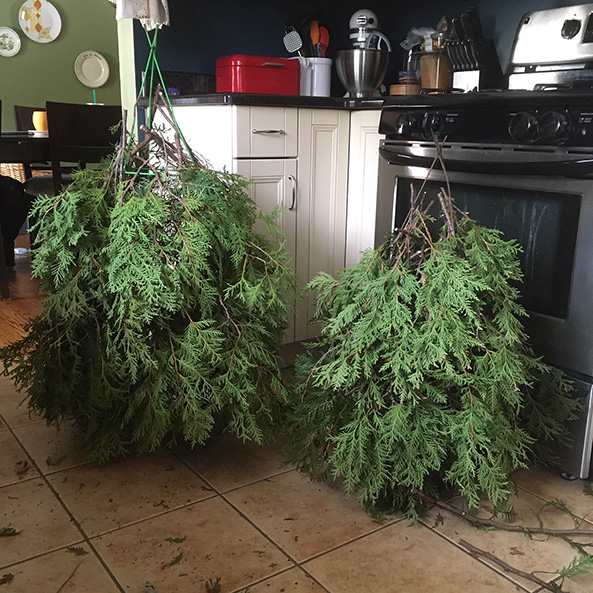
I used cedar because I have a backyard full of overgrown cedar trees but garden centers have other options that I’m sure would work just as well. As far as quantity, it would depend on the size of your tomato cages and the fullness of the greenery. I had about 40 boughs but my cedars are a bit spindly this year. The branches at the garden center were much more robust and uniform so you’d probably need less if you’re going that route.
1 yard of red felt (or colour of your choice for the hats)
½ yard of grey felt (or colour of your choice for the mittens)
OR
Child-Sized Mittens
I made mine from felt because I had a lot of it in my fabric stash but a much easier solution would be to get a few pairs of small mittens from a thrift store.
Knee-high Hose (for the nose)
Last year I made noses made from unbleached cotton but the fabric was too heavy and I wasn’t happy with the shape so this year I tried something a little different.
Cotton or Polyester Stuffing
Floral wire
I think the kind I’m using is about 20 gauge but it really doesn’t matter. P
Needle-Nose Pliers
Scissors
Needle and thread or sewing machine
To make the hat, I’m not going to re-invent the wheel here and instead, I’m going to direct you here to this tutorial. Just make sure to measure the circumference of your cages at the first rung and then the length from the rung to the top point of the cage and add an inch. The seam of my large lat was 21 inches and my small hat it 18 inches high.
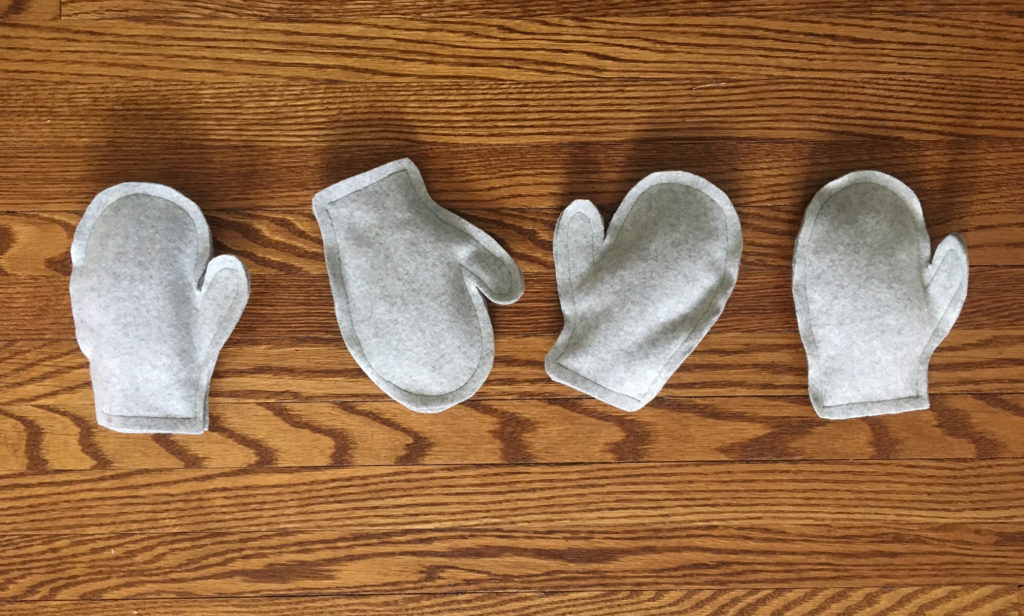
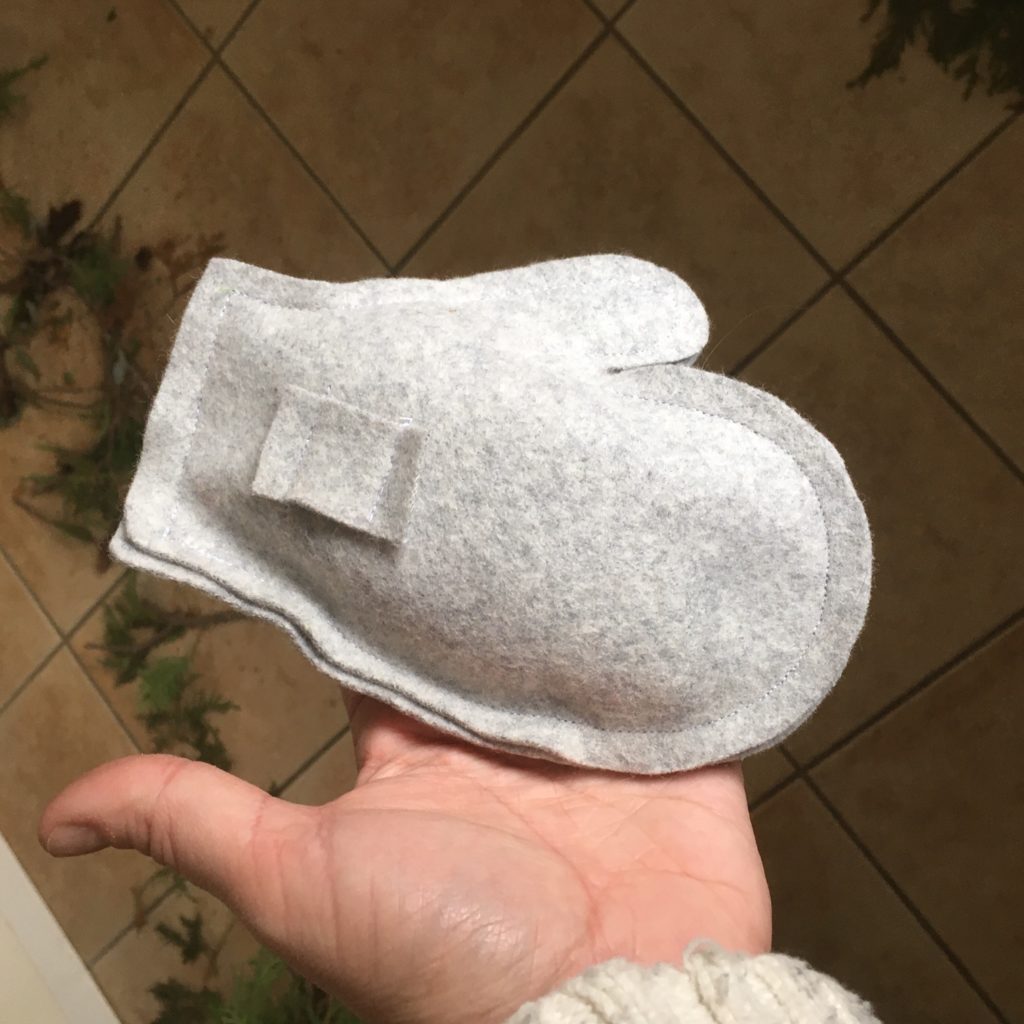
For the mittens, I traced one of my own mittens and adjusted the size a little so they were slightly smaller. I cut 2 pieces of felt for each mitten and then added a little loop on one side of each for the wire. Then, I sewed around the edges, leaving a small gap for the stuffing, added a small handful of polyester stuffing to each and then sewed them shut. I have happen to have a huge stash of felt and in the interest of not buying more stuff, this worked best for me. However, if I wasn’t a fabric hoarder I would have popped by the dollar store or maybe thrift store and picked up a few pairs of kid-sized mittens.
To make your bodies, turn your tomato cage upside down so that the pokey parts are at the top and tie them together with floral wire.
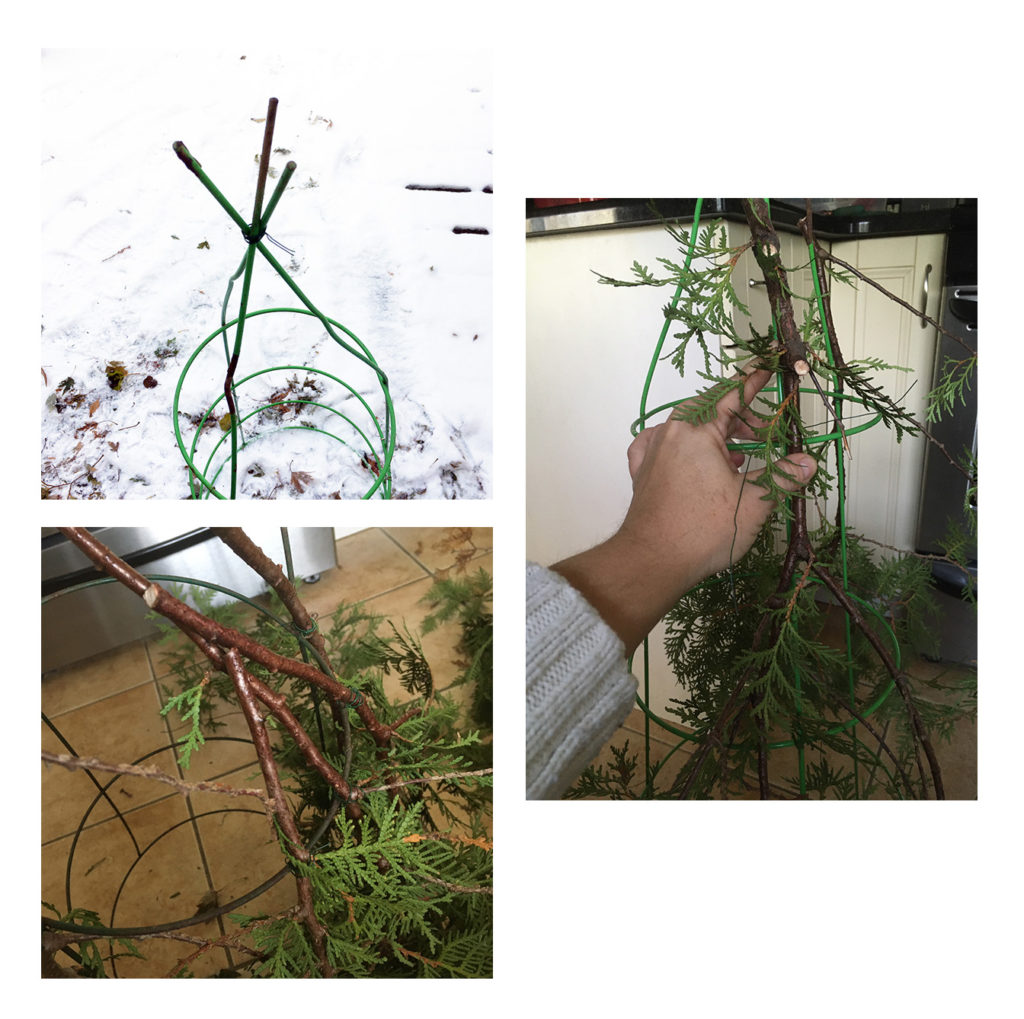
Attach your boughs to the top ring with floral wire, working your way around the cage and fill in any gaps.
Next, you need a nose.
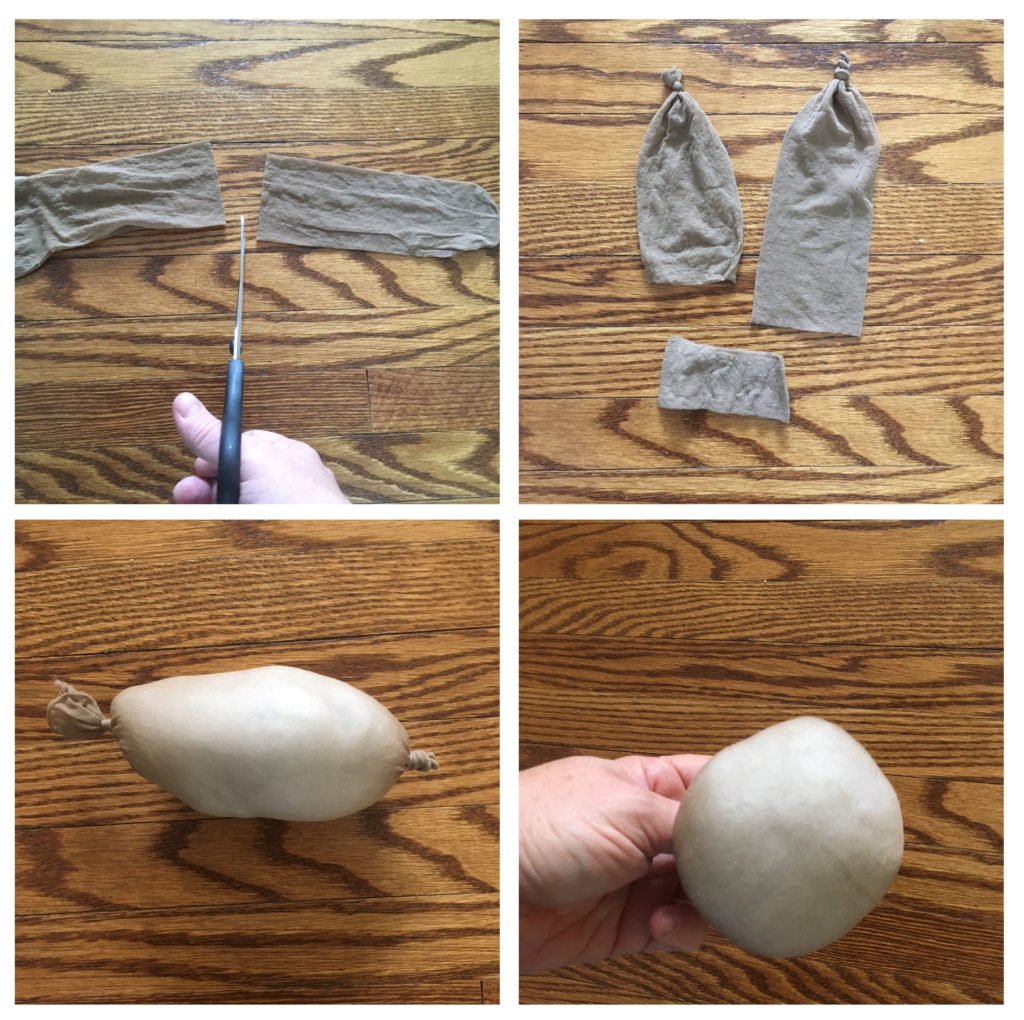
Cut your knee-high nylon sock in half. Knot one end and fill with a handful of stuffing. Knot the other end and then tie the two knotted ends together.
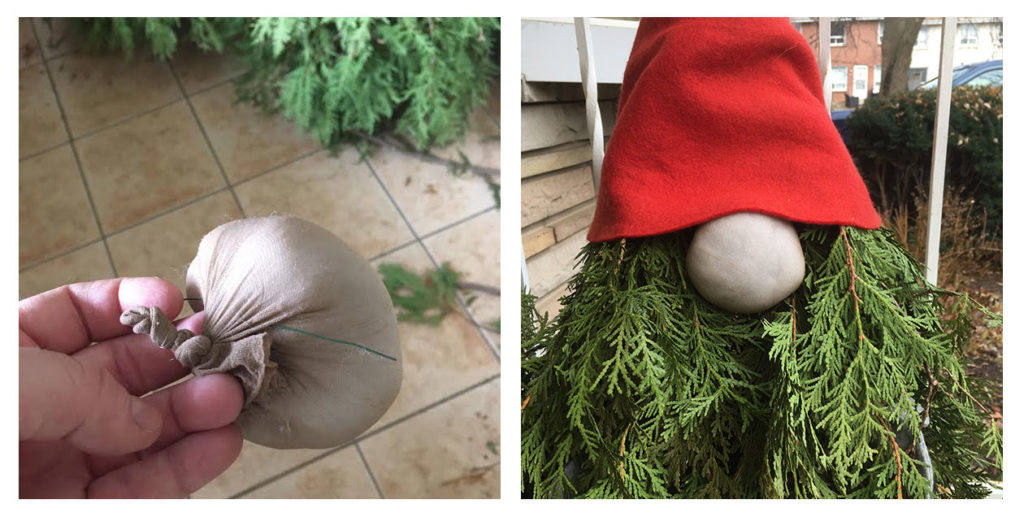
Slide a piece of wire through the loop behind the nose and attach it to the top ring of your cage.
When you slip the hat on it should cover the nose by about an inch.
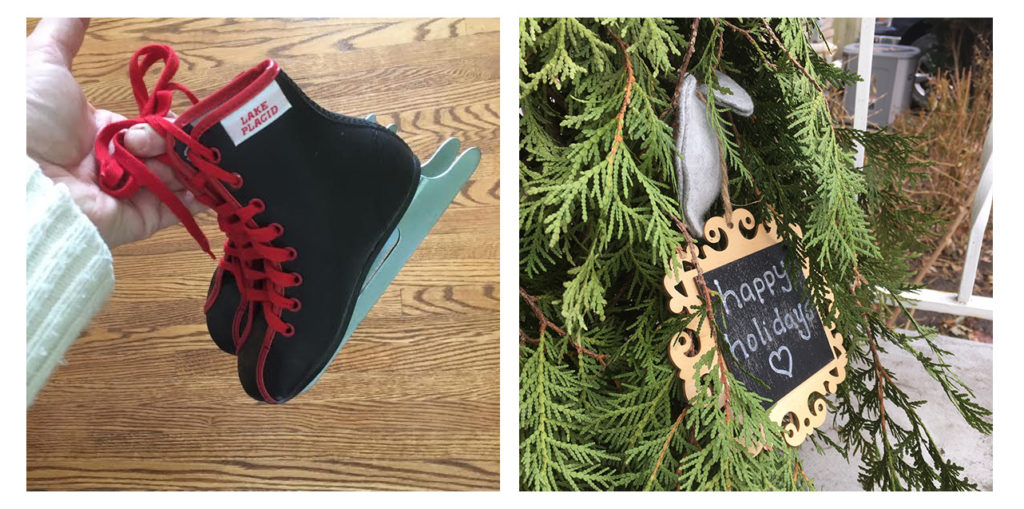
At this point, you could call them done but I added a few little embellishments to mine. I’d had these vintage ice skates in my craft cupboard for years waiting for the right project. I didn’t want to leave Thom empty-handed, so I made him a little sign out of a little chalkboard from Dollarama.
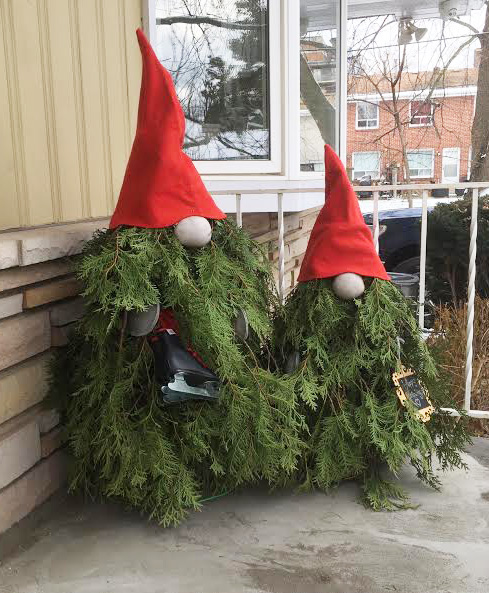
Voila! Let me know if you have any questions. Happy crafting!
3 Comments
where can I purchase one of these?
I would check garden centers, I did see something similar recently at one local to me.